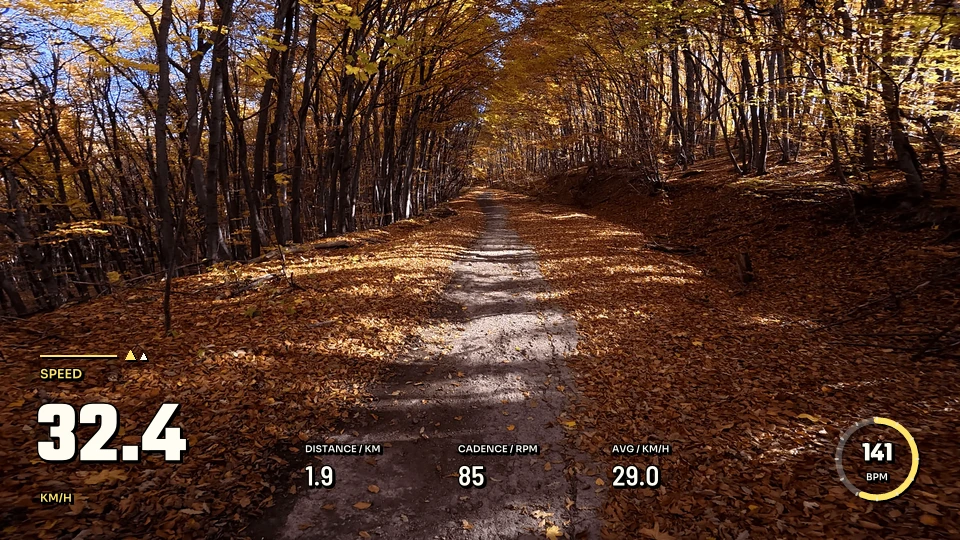
You may already have an editor you like for cutting footage, mixing sound and finishing a video. Movaro can turn your recorded activity data into a separate video layer for that edit, with transparency, a background you can key out, or a matching fill and matte pair.
Start with one source clip. Get its data, timing and layout right in Movaro, export the overlay, then test it above the matching footage in your editor. This guide follows Movaro 1.4.3, available for macOS and Windows.
Choose the output you need
Open Exports. Choose Clips for individual source videos with telemetry included, or Timeline for the edited sequence as one movie. Choose Overlays when you want to combine the footage and telemetry yourself in another editor.
An overlay export is a rendered video containing changing readings for a source clip or an activity. A .movaro package is a reusable layout design with its image and custom-font assets. Layout import/export and Community sharing are included in Free; the package and rendered video serve different purposes.
Prepare one matching clip
Bring in your recorded GPX, FIT or TCX activity, or import it through your connected Strava account, then add the footage. Choose the relevant session where needed and check the sync at a recognizable moment. Heart rate, cadence and power depend on which readings the recording contains; a route file does not necessarily include them.
Choose a built-in or Community layout and check its placement over the footage. Overlays preview live as you play, scrub or change the layout and settings, including while paused. You can adjust the design without generating preview files first.
Set up the overlay export
In Exports → Overlays, use the Videos step to choose the source clip you want to test, then open Choose settings. Review the background, canvas, layouts and overlay frame rate. Settings start from your project; you can override them for this export where needed, with the same plan requirements.
Keep the overlay canvas consistent with the footage and sequence in your other editor. Match source resolution, available on every plan, keeps each source video's own dimensions. Studio and Founder also support exact custom canvas dimensions.
Free's overlay cadence is 3 fps. Creator, Studio and Founder offer 3, 5, 10, 24, 30 and 60 fps presets. This controls how often the overlay updates; it does not reduce the footage's frame rate and does not need to match it.
Choose a background your editor can use
In Background, choose the handoff that suits your editor:
| Choice | What Movaro exports | How to use it |
|---|---|---|
| None | A transparent MOV with HEVC alpha on macOS, or WebM with VP9 alpha on Windows | Place it above the footage in an editor that supports that alpha format. |
| Green, Blue or Custom | The overlay on a solid colour | Remove the background with your editor's chroma key. |
| Matte | Two videos: the overlay's colours as a fill, and its transparency as a black-and-white matte | Use the matte as a luma track matte for the fill in an editor that supports this workflow. |
For solid-colour and fill + matte exports, Standard produces H.264 MP4 files and is available on every plan. High produces ProRes 422 HQ MOV files and requires Creator, Studio or Founder. These files are opaque: the key or separate matte creates the transparency in your editor.
Choose a key colour that your layout does not use. Semi-transparent panels, soft text edges, gradients and shadows blend with a key colour and can leave tinted edges after keying. If those details matter to the design, try the transparent or fill + matte output.
Alpha, chroma-key and track-matte support vary by editor, version and operating system. Test the format you intend to use before exporting a whole project.
Open Choose destination, then Review export. Check the selected videos, canvas, layout, background and frame rate, then choose Export overlays. Open output folder takes you to the result. Files save in the destination's Overlays subfolder; the default destination is your project's Exports folder. Exporting again adds a number to the file name instead of replacing the previous result.
To revise a result, use Modify settings or Modify last export. Repeat last export reuses its videos and settings.
Export from an activity alone
You can also create a project without videos and export one overlay for the activity. Trim the activity to the range you need, choose its canvas and layout, and use the same background options. This lets you prepare telemetry while keeping the footage in your other editor.
That overlay follows activity time. Align the matching moment in the activity overlay with the matching moment in your footage; its start does not automatically coincide with a camera clip's start.
Keep the overlay with its footage
For a source-clip export, import the original clip and its matching overlay. Place the overlay on a track above the footage with both starting at the same point. Enable its alpha, apply the chroma key, or connect the fill and matte as appropriate. The footage should show through the empty areas.

The source-clip overlay follows that clip, rather than a sequence you may already have cut elsewhere. If you remove the beginning of the footage, trim the same amount from its overlay. Keep the pair together when splitting, moving or shortening a section; your editor's linking or grouping controls can help. With a fill + matte export, keep both overlay files aligned too.
Check the canvas and placement after cropping or repositioning footage. Retiming also needs care: slowing the footage while leaving the overlay at its original speed breaks the match. Apply the corresponding timing change to both and review the start and end of the section.
Check a finished sample
If a transparent overlay appears as a solid rectangle, check your editor's support for the alpha format and whether it is using the alpha channel. A .mov or .webm extension alone does not establish transparency support. Try a keyed background or fill + matte if your editor supports those instead, or choose Clips to export footage with telemetry already included.
Export a short finished sample from your editor and watch the file. Confirm that timing, transparency and framing survive the final export before applying the workflow to more clips.
Explore these overlays
Choose a design from Movaro Community and make it your own.

